Update Summary:
- Mobile Attachment Gallery
- Warn When Creating a STEMI Without an ECG
- Search to Find Incident Location
Mobile Attachment Gallery
What's changing
- We made it easier to add and view Images and ECGs in a mobile patient channel
- A more consistent way to add patient attachments through use of the Camera and + Add buttons
- Images are the most common attachment type, so we added special add button to jump right to the camera for adding images with fewer taps
- Images can be added via the new Camera button or the existing +Add button
- Audio Clips and ECGs can be added using the +Add button
- We completely updated the camera to:
- Make it easier and faster to add multiple images
- Preview the images in a scrollable gallery view
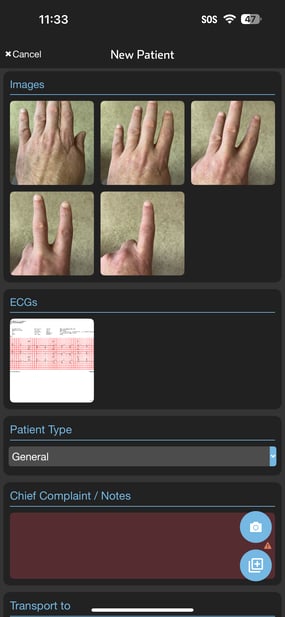
- Once images are added to the patient, they display right on the patient screen and are visible without opening an additional screen.
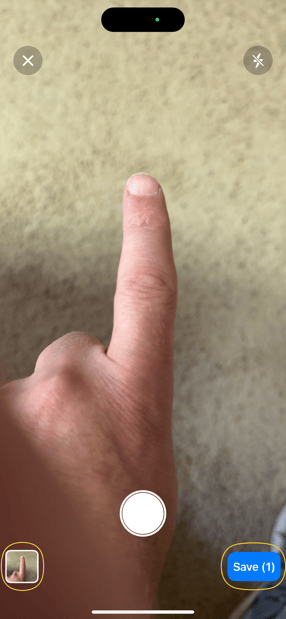
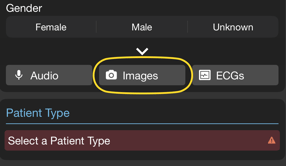
Tap Camera button to Add Images Tap +Add button to Add ECGs or Audio Clips
![]()
![]()
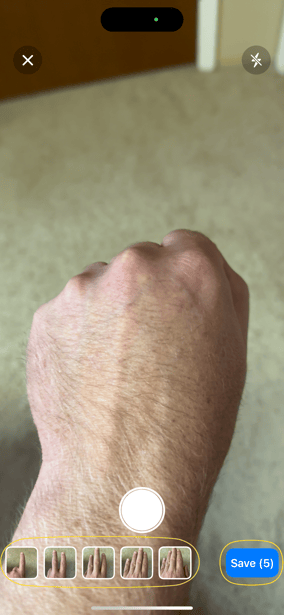
A new camera allows for easier image acquisition with fewer taps. Simply open the camera, tap the shutter button one or more times to capture images, and tap Save to add them to the patient.
Acquire one image Acquire multiple images
After saving, Images and ECGs appear in a thumbnail right on the patient screen. To view a larger version of the images, tap on them and scroll left or right.
Images and ECGs on patient screen Expanded Image in Scrollable Gallery View

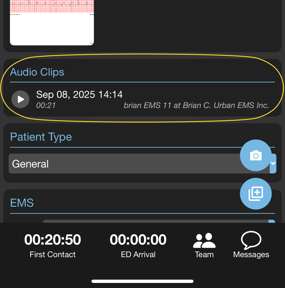
New Inline Display of Audio Clips and Auto Play
-
To Add an Audio Clip use the +Add button, record the clip and tap Save, it will appear right in the patient channel instead of a sub-screen as in the past
-
To play the audio clip, simply tap anywhere on the Audio Clips area of the screen and it starts playing automatically
Acquire and Save Audio Audio Clip on Patient Screen
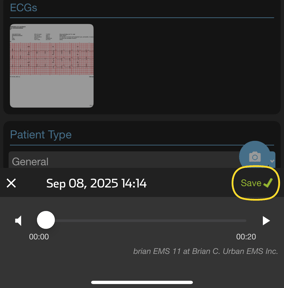
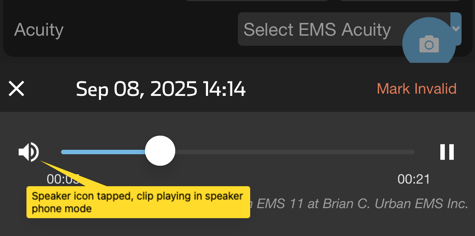
NOTE: Audio clip auto play occurs in earpiece mode (low volume). To hear the audio in speaker phone mode (louder), tap the speaker icon.
Guided Transition Toward New Patient Attachment Workflow
- For now, we left the Audio, Image, and ECG buttons in place to help teach the new way of adding these items, which is to use the Camera button (for Images) or the +Add button (for ECGs and Audio Clips)
- The example below illustrates the in-app instruction after tapping the Images button. Tapping the Audio or ECGs button will produce a similar result with tailored messages for those items
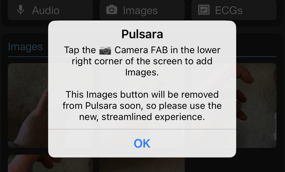
NOTE: The Audio, Images, ECGs buttons will be removed in an upcoming mobile release
Who’s impacted
- Care givers who create and update patient channels
- Those who add Images, ECGs, and Audio Clips to patient channels
Rollout Timing
- This change will become available in Pulsara mobile version 63 starting on September 17th
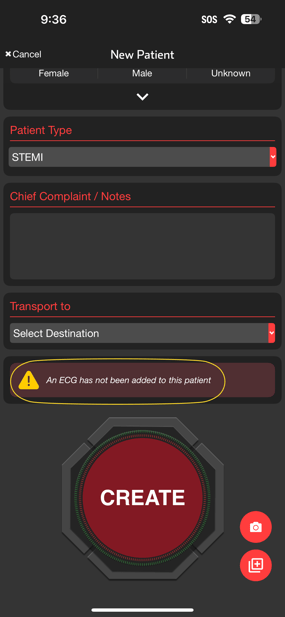
Warn When Creating a STEMI Without an ECG
What's changing
- When creating a STEMI patient without an ECG added, a warning will display to make it clear the patient channel does not have an ECG attached
NOTE:
-
If a picture of an ECG print out is added via the Images option in the +Add button or the new Camera button, the warning will appear
-
If an ECG is added as an Image, via the +Add button, or the new camera button, the warning will appear.
Who’s impacted
- Care givers who create STEMI patient channels on Pulsara Mobile for iOS or Android
Rollout Timing
- This change will become available in Pulsara mobile version 63 starting on September 17th
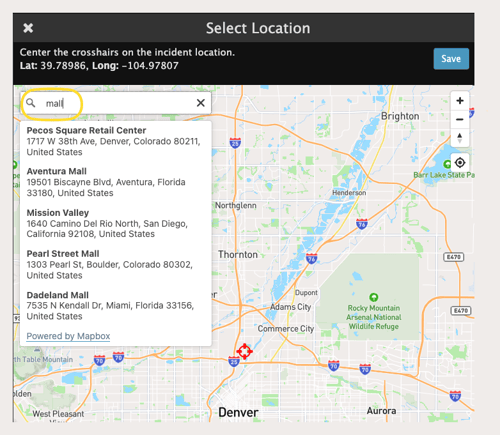
Search to Find Incident Location
What's changing
-
We added search capability into our existing map view for setting Incident location
-
Locations for an Incident can be found and set using
-
A specific address - "138 East Main Street..."
-
A point of interest - "mall" or "school" or "restaurant"
-
Locality type (city, neighborhood)
-
Latitude/longitude coordinates
-
-
Matching items appear as you type. Simply click on an item and the map centers on that location. Click Save to set that as the Incident or Mission location
NOTE: We also made this capability available on the Availability page in Pulsara to more easily look up facility status.
Who’s impacted
- Those who create and update Incidents and Missions in Pulsara Web
- Those who look up facility availability status in Pulsara when transporting or transferring a patient
Rollout Timing
- This change is currently available in production