Patient Details in Pulsara Web for EMS and HQ
- Patient Timeline
- Images/ECGs
- Audio Clips
- Conversation
- Flowchart/Notes
- Labs, Vitals, Contacts & Team Alerts
- Requests
Patient Details
Click the View Patient Details (triple dot) icon on the right side of the patient row to open the patient details panel.

The details panel includes patient demographics, images, ECGs, audio clips, and more. The image below shows the Patient Details panel.
NOTE: The patient details panel will display only information that has been added to the patient channel. In order to provide access to all of the information in the panel, it scrolls vertically.

Patient Labels
A label is a way to add a tag to a patient channel that displays relevant information throughout the patient journey. Adding labels to a patient channel quickly communicates important information to everyone who encounters the patient. A few examples of labels are “COVID+” or “Isolation Required”. For more details on How to Add Labels to a Patient Channel click here.

Patient Timeline
See an expanded chronological listing of important patient events including First Contact, EMS Scene Departure, ED Arrival, and more. Below each entry in the timeline, the entity is displayed for the associated event. The Timeline shows times that were set and not set to aid in QA after the patient event is stopped.

View and Add Images & ECGs
In the Images and ECGs sections, any attached Images or ECGs can be viewed. Images and ECGs can also be added to the channel by selecting + Add and then selecting Images or ECGs. The panel will display a thumbnail preview of each image that is attached to the patient channel. If a closer look is needed, click on the image to view a larger version of it.

Listen and Add Audio Clips
Audio Clips that have been attached to the case in mobile will be available for listening in the Audio Clips section.

Send and Receive Team Messages
View and send secure messages in the conversation area of the patient details panel. Timestamps and sender information are visible for each message. Messages added in Web for EMS, HQ or in Pulsara mobile are visible here.
Ad hoc messages can be added by simply typing into the “Pulsara Message” field.

Alternatively, click the “+” button to select from a predefined list of templates to reduce typing and help ensure consistent team communication.

Additional text added to the template will appear below the template, as seen in the example below.


Badge indicators for new messages added by other team members appear on the patient list and Patient Details panel.


View and Add Flowchart/Notes, Labs and Vital Signs
Flowchart/Notes
View and add pertinent information like medications and treatments in the Flowchart/Notes section. Timestamps and sender information are visible for each Flowchart/Note.
For detailed information on how to use Flowchart/Notes in Web for EMS or HQ click here.

Labs & Vital Signs
Labs and Vitals can be added. Any Labs or Vital Signs added in the Pulsara mobile app will also be available for viewing.


View Contacts & Team Alerts
Contacts
Contact information for witnesses or patient family members can be added and is available for review. Click the Contacts icon to display their contact information or + Add to add a contact.

Team Alerts
See incoming patient alerts and which care team members have acknowledged the patient. Each entity will appear in its own section with corresponding team members. Click on individual team members to see their alerts appear in a new panel.
Alerts listed with a green checkmark have been acknowledged by the listed team member. Alerts that appear with an hourglass, have been sent but not acknowledged.


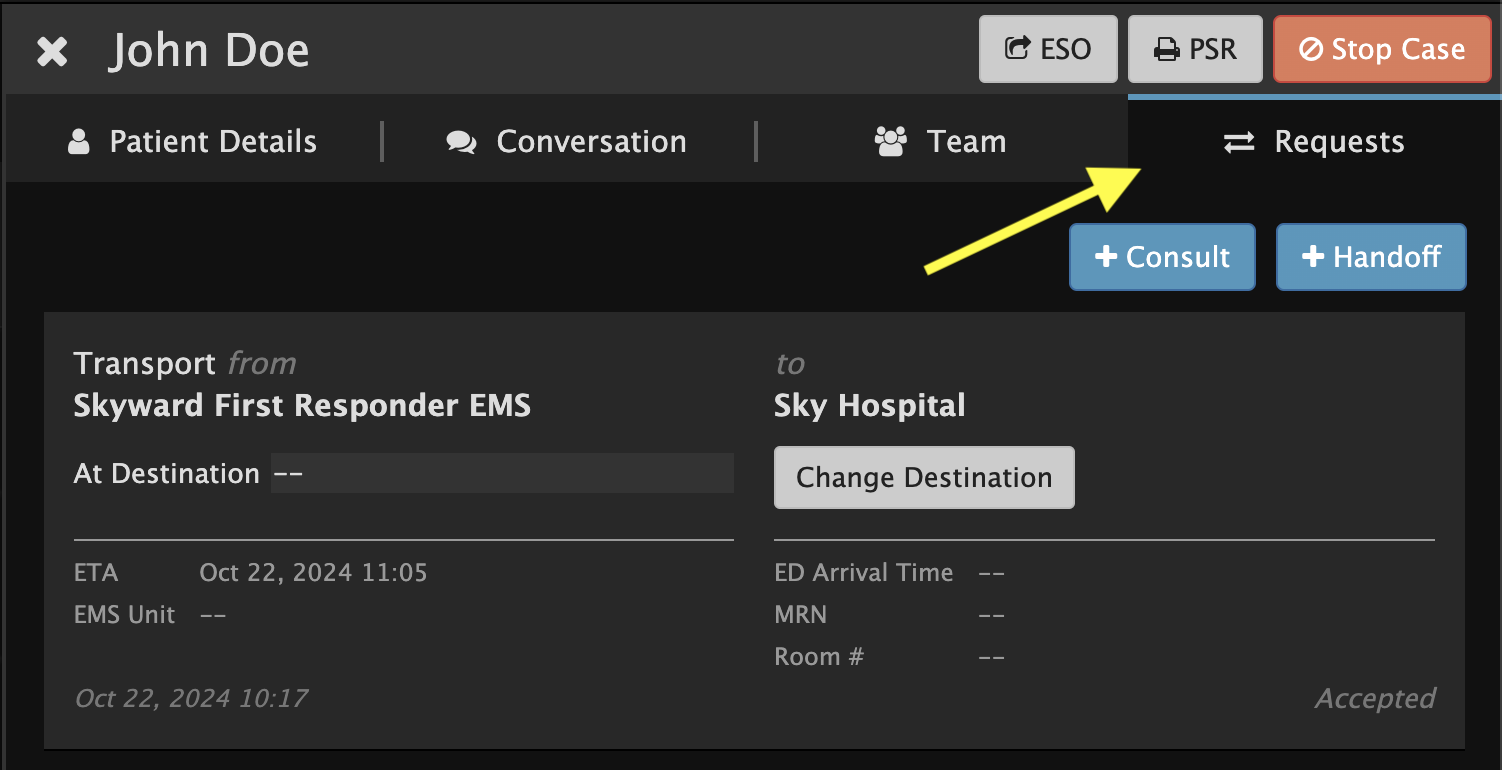
View & Send Requests
There are two types of Requests in Pulsara:
- EMS Transport is a request for the health care facility to take over care for the incoming patient.
- Handoffs, Consults, Transfers are requests where one entity asks that another entity either participate in or take over patient care.
See a complete history of requests by the care team, in chronological order from first to last. Each request displays helpful information for the patient, at each step of the journey.
For details on how to add a Request from Web for EMS or HQ, click here.
For more information review setting At Destination in Create a Patient Channel in Pulsara Web for EMS and Changing Destination in EMS/Ambulance Change Destination.