The web product area formerly called HQ is temporarily named Patients HQ. It will soon be changed to simply Patients
What is the Patients area in Web?
"Patients" is a browser-based list page that shows patient channels created by your agency (admin) or by your Unit (EMS crew members). It serves both as a way to view and make updates to patient channels and a way for supervisors to monitor their units, view facility acknowledgement status, transport locations, and ETA.
How do I find Patients in Web?
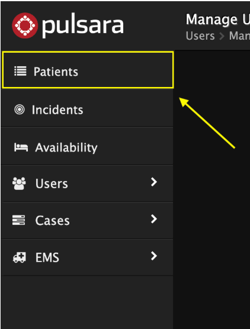
All EMS team members will see the Patients menu navigation item, click it to view the patient list.
Understanding the Patient List
The web patient list is an area where patients can be created, updated, and viewed all from one screen
The patient list displays patient channel Type, Chief Complaint / Notes, Name (or initials), Age, Gender, Unit, ETA, Destination, and hospital organization acknowledgment status.
The list also provides a View Collaboration button that opens the Request details panel to see more information about transport, consult, transfer, or handoff details.
For EMS Administrators, the patient list will display patients created by all team members and units at their EMS Organization.
For EMS Users without permission to see all patients at my facility, the list shows patients created by themself and other Pulsara end users selected as teammates for their shift.
For the transport destination, the list displays the following key information:
- A green check mark for patients where the destination facility has acknowledged the patient
- A red circle for patients whom the destination facility has not acknowledged
- “Destination Not Set” for patients with no destination selected
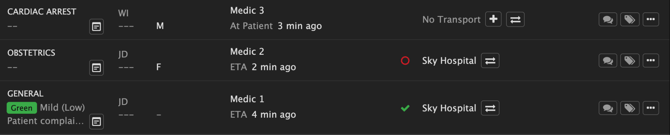
The “Add Transport” (+) button appears for patients with no destination selected. Click the button to view the Add Transport pane to specify a Destination facility.
For any patient listed, click the View Collaborations button ![]() to see the list of entities involved in patient care. This is also the location l where team members can set At Destination and/or Change Destination.
to see the list of entities involved in patient care. This is also the location l where team members can set At Destination and/or Change Destination.
The Conversation icon, Labels, and View Patient Details buttons appear on the right side of a patient row. Click the Labels icon to add a label that can be viewed by team members at your facility or across all facilities involved in patient care. To learn more about Labels, view this article.
Patient List Visibility Settings
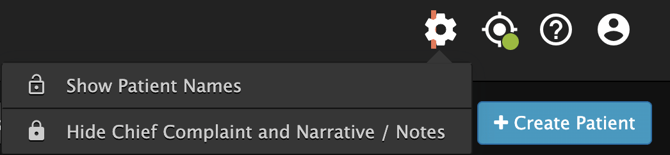
By default, the web patient list defaults to show Chief Complaint / Notes and hides the Patient Name. To change the visibility of either Chief Complaint / Notes or Patient Name, click the gear icon and toggle the desired visibility setting.
Patient Indicators and Filters
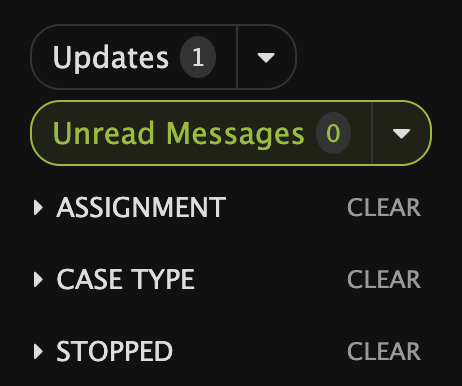
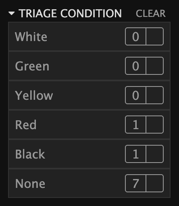
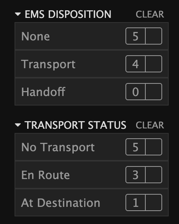
Patients can be filtered by Assignment for users with all patient rights, case Type, Case Stopped, EMS Disposition, Transport Status, Triage Condition, Test Status, and create date. Additionally, patients can be filtered to indicate any patients with Updates or Unread Messages.
The “Updates” indicator shows the number of patients with updates that the current logged in user has not seen. When clicking on the indicator, it displays green and filters the patient list down to show only the patients with updates.

When a patient has an update, the patient details (“...”) button in the corresponding patient row appears with a red badge.

Patient updates reflected here include changes such as the addition of new Images, ECGs, Audio Clips, as well as edits to items like ETA, Room Number, Cath Lab Ready.
The “Unread Messages” indicator shows the number of patients that have messages that the current logged in user has not read. Click the indicator to filter the list of patients to display only those with unread messages.
When a patient has a message that you have not read, the Conversation icon appears with a red badge.

Filter by Case Type

Filters can be mixed and matched to find the exact results of patients you need.


Use the EMS Disposition and Transport Status filters to view patients by their current status, such as Transport, Handoff, No Transport, En Route, or At Destination.
Click the “CLEAR” option next to any selected filter to remove the filter.
Collapse filters by clicking the filter category name to focus on the filters that are most important to you and reserve screen space for the most used filters. Click the category name again to reveal the filter options.
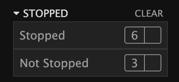
The Stopped Cases filter defaults to 'Not Stopped,' which limits the view to only active patient channels.
Create Date Filter defaults to created within the last 30 days. The create date filter helps reduce the patient list by displaying only patients created within the selected time period.
NOTE: The selection made in the created date field will remain in place across application logins and between logins. So, if certain patients do not appear in the list, double-check that the selection in this field is correct.
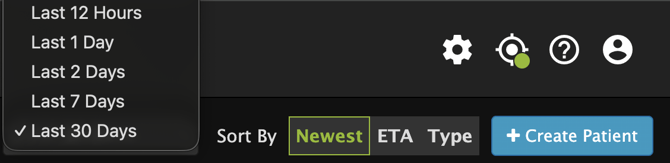
The sort options in the upper right allow you to sort patients by Newest, ETA, and Type. When the list is sorted by the Newest option, the most recently created patients will appear at the top.

Searching for Patients
The patient list supports searching for patients by Patient Name, Age, Chief Complaint, Narrative / Notes, Transport Destination, or EMS Unit. Searching for the patient’s name will display results even if only initials are shown in the patient list.

Viewing and Editing Patient Details
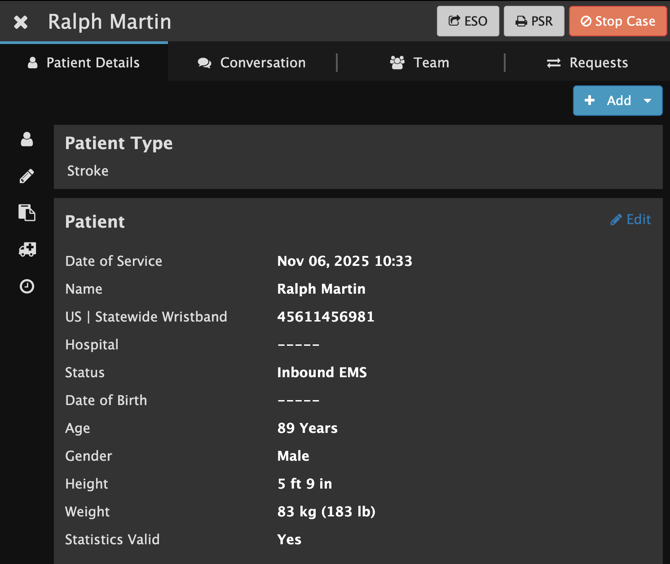
To see or edit patient information, click the View Patient Details button for a patient row. The patient details pane allows viewing and updating the full details for a single patient (demographics, images, ECGs, audio clips, etc.) and allows other key functions like Team Messaging, Activating, Stopping, and Transferring a patient or viewing the Pulsara Summary Report.

From the patient details pane, you can view and modify patient details. Patient information is grouped into four tabs: Patient Details, Conversation, Team, and Requests
To view or modify most patient information, select the Patient Details tab. Scroll the details pane vertically to see patient information. To add additional information, click the +Add button or the Edit button in the section where the edit is desired (i.e. Patient section). The Patient Details tab also displays “skip to” icons along the left of the panel that will quickly bring the desired section into view - i.e., “CC/Narrative,” “EMS,” “Patient Timeline”, or “Images,” etc.
To communicate with other team members involved in care for this patient, click the Conversation tab to view existing messages or add a new Team Message.
Click the Team button to view and update team members involved with patient care. You can also view the patient alert acknowledgment status from here.
Click on the Requests tab to view Requests related to the patient, see entities involved in patient care, or initiate a Consult or Handoff.