Inviting and Managing Admin Users
In this article, we will review the following:
- How to Invite a New Pulsara Admin
- How to Upgrade an Existing User to Admin
- How to Remove Admin Privileges from a User
How to Invite a New Pulsara Admin
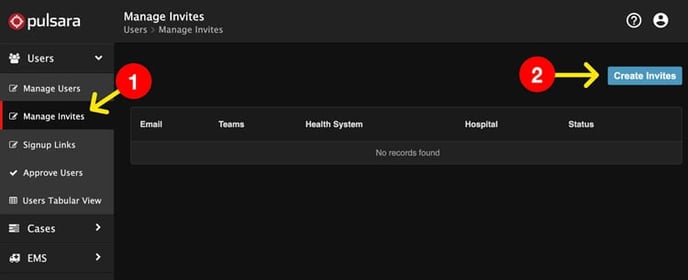
To add a new admin account to Pulsara, log in to Pulsara MANAGER. On the left side, go to the Users tab and select Manage Invites. From there, click the Create Invites button.
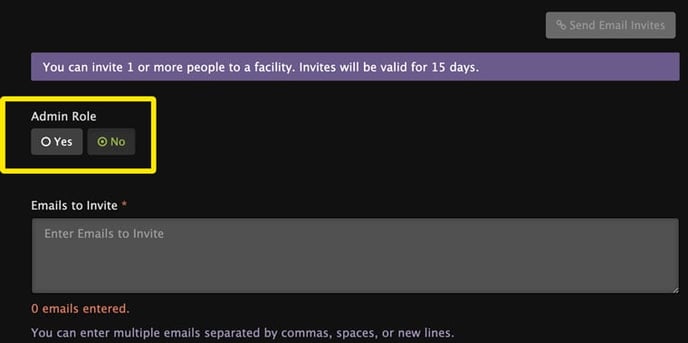
On the Email Invite form, change Admin Role to Yes to provide admin privileges to this user. Multiple email invites can be sent at one time by specifying additional email addresses. Click Send Email Invites after completing the form.
Once they complete their account setup, they’ll have access to Pulsara MANAGER.
Note: For Hospital Users to gain access to Pulsara MOBILE, an extra step is required to add the user to a hospital team. For more information, check out this article on preparing to log in to MOBILE with an Admin account.
How to Upgrade an Existing User to Admin
Locate the existing Pulsara user by clicking Manage Users under the Users tab on the left side of the screen.
Change the Radio button from Admin Users to All Users.
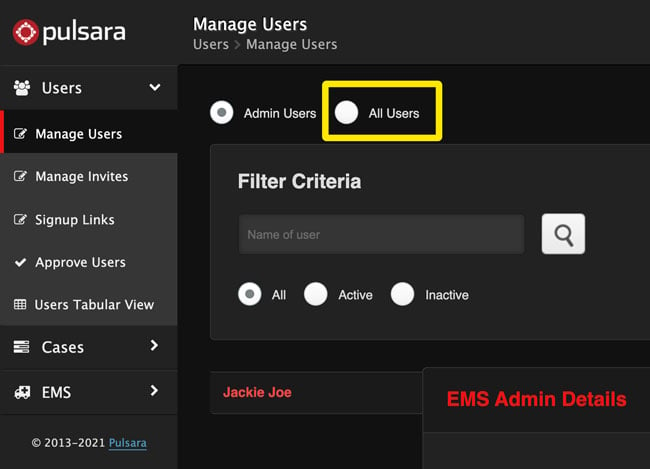
To locate the user, search by first name, last name, username, or email. You can also locate them by scrolling through the user list.
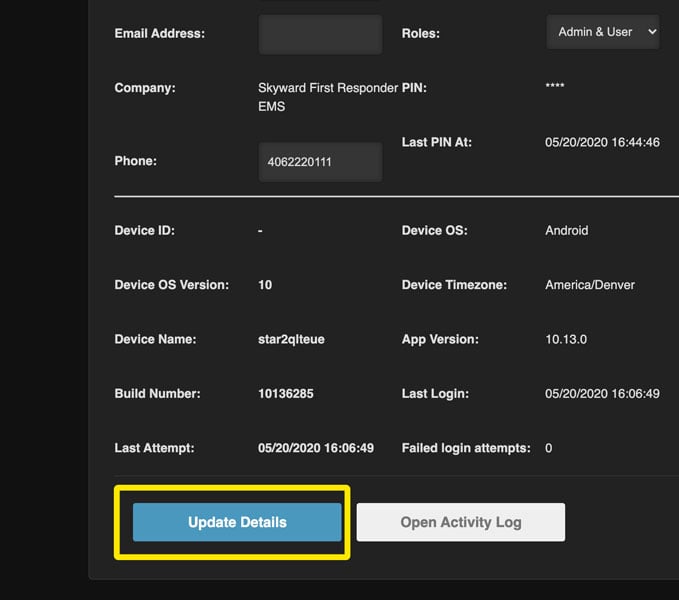
Click the pencil icon to edit the account. Locate Roles within User Details. Open the dropdown to change their role from User Only to Admin & User.
Note: You can not edit a user’s role if they have privileges at different facilities than you. In this scenario, the Roles field will be read only with a (?) next to it.
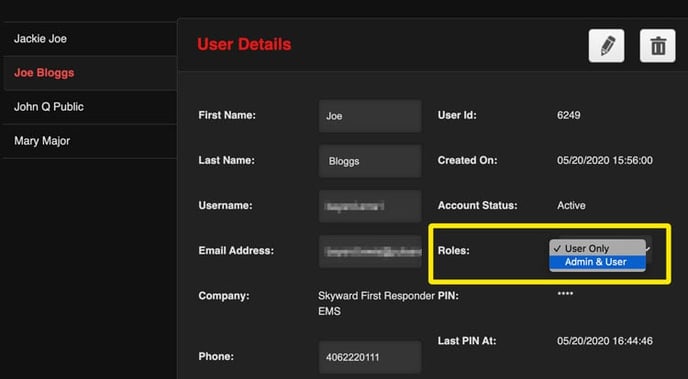
Now, scroll to the bottom and save your changes by clicking the blue Update Details button.
Congratulations! You've promoted a User to Admin! With the role of Admin, they can now perform administrative actions in Pulsara MANAGER as well as participate in active patient care in Pulsara MOBILE and Pulsara HQ. (The team must have access enabled by Pulsara Customer Success to use Pulsara HQ .)
How to Remove Admin Privileges from a User
To remove Admin privileges from an account, simply edit the account and select User Only in the Roles menu. After the account is saved, the user will no longer have the ability to perform administrative functions upon their next login.