Accepting a Transfer Request
From the Patient List, click on Accept in the corresponding Patient Row.
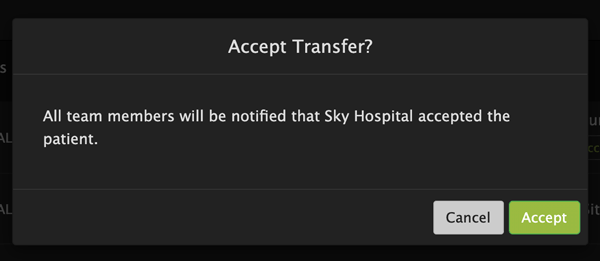
When accepting a Transfer, a prompt will appear confirming that your facility wants to accept the Transfer.
Click Accept to continue.
The Patient’s status will change to Inbound.
After Accepting the Transfer request, the following alerting actions will occur in Pulsara:
- Team members at the receiving facility on call for incoming transfers will receive a primary alert to inform them the patient is coming
- Team members at the requesting facility will receive a notification that your facility accepted the Transfer patient.
When the patient arrives at your facility, click the timer to set the ED Arrival time. This is an important step that marks the Transfer as completed and communicates important status information to both the receiving and transferring facility.
Click inside the gray box to set the ED Arrival time.

The current time is automatically entered into the box. Make any changes as needed, then click on the check mark to complete setting the time.

The Patient’s status will now update to On Site.

Rejecting a Transfer Request
From the Patient List, click Reject in the corresponding Patient Row.

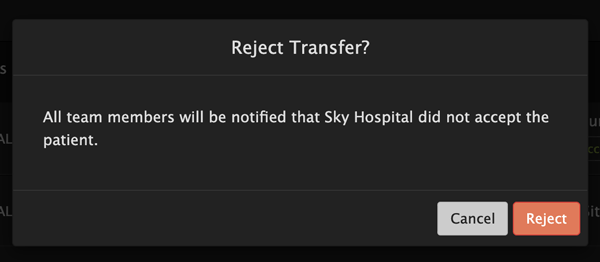
A prompt will appear confirming you want to Reject the Transfer.
Click Reject to continue.
After rejecting the Transfer, the patient will be removed from your patient list automatically and the transferring facility will receive an alert indicating the transfer was rejected.
To accept this patient at a later time, the initiating facility will need to send another Transfer Request.