Contact ESO
The integration to Pulsara requires activation on the ESO side first. Please contact your ESO sales rep to begin this process. If you do not know your ESO sales rep, start a support case by sending an email to support.ems@eso.com.
Entity Configuration
An ESO integration can be setup or edited by an EMS admin.
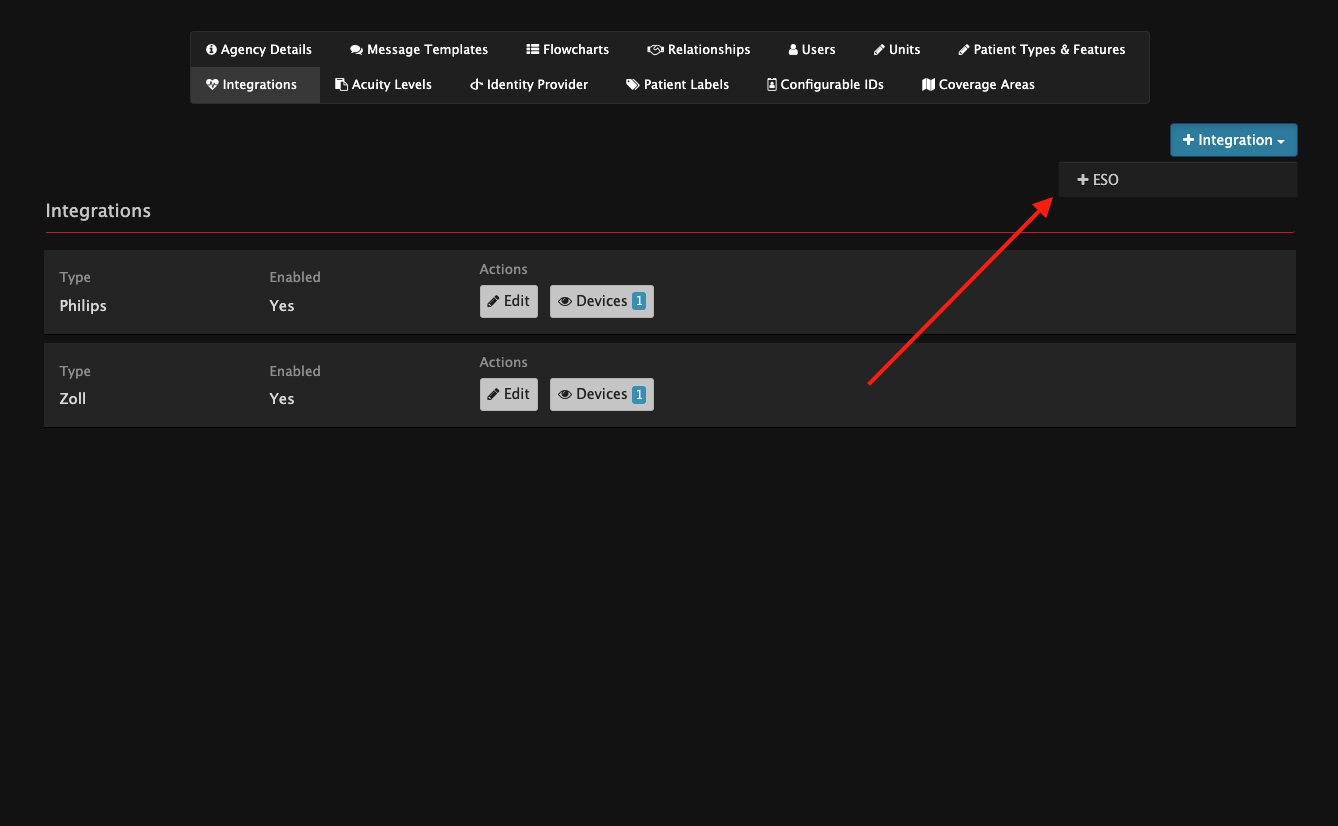
- Log into MANAGER and navigate to the Integrations screen for the EMS Agency
- Click +Integration and choose “+ESO” from the dropdown menu
- Fill in the fields with your entity’s information and click Save
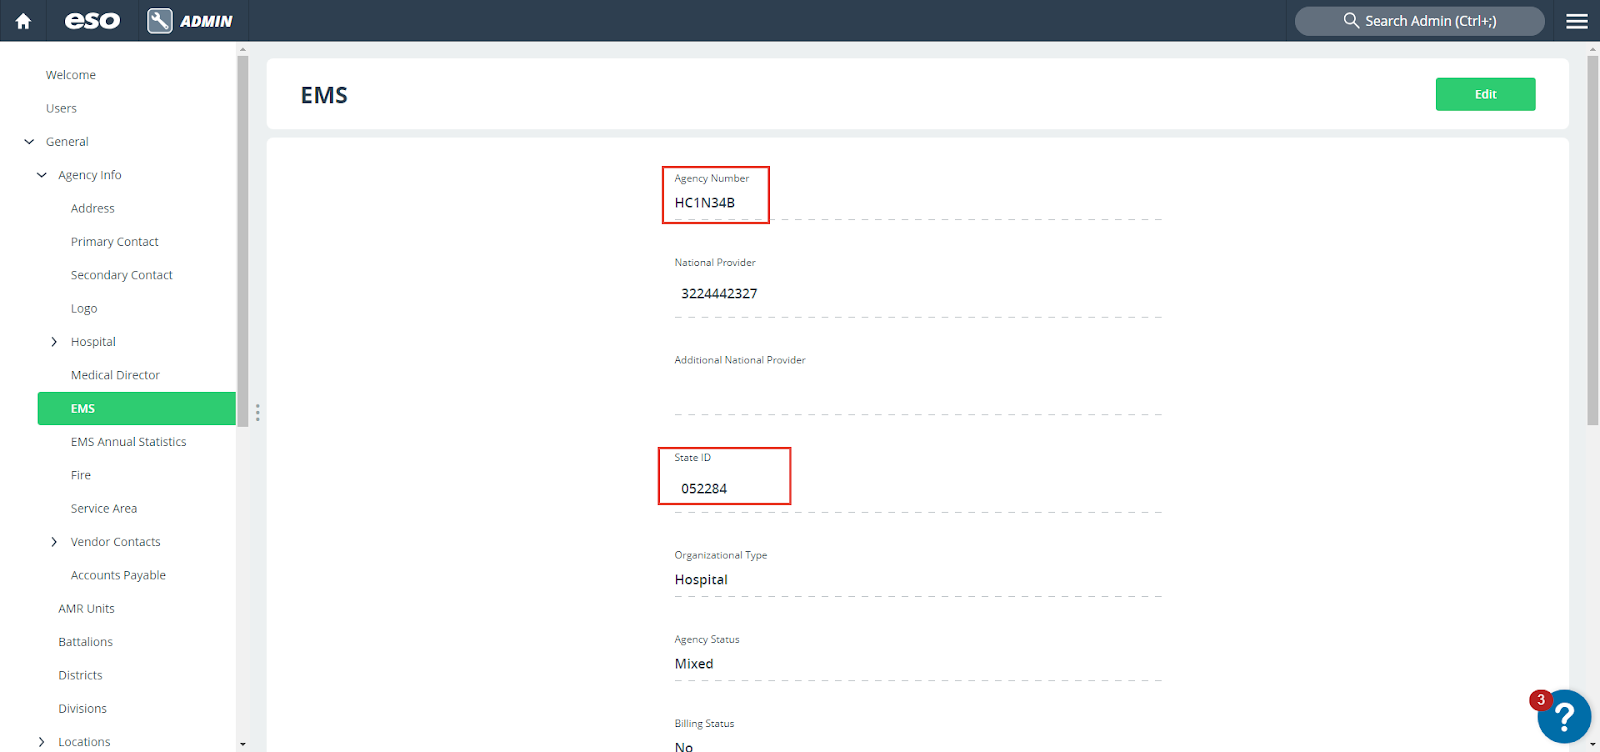
- Pulsara “Agency Number” = ESO “Agency Number”
- Pulsara “Agency Stated ID” = ESO “State ID”
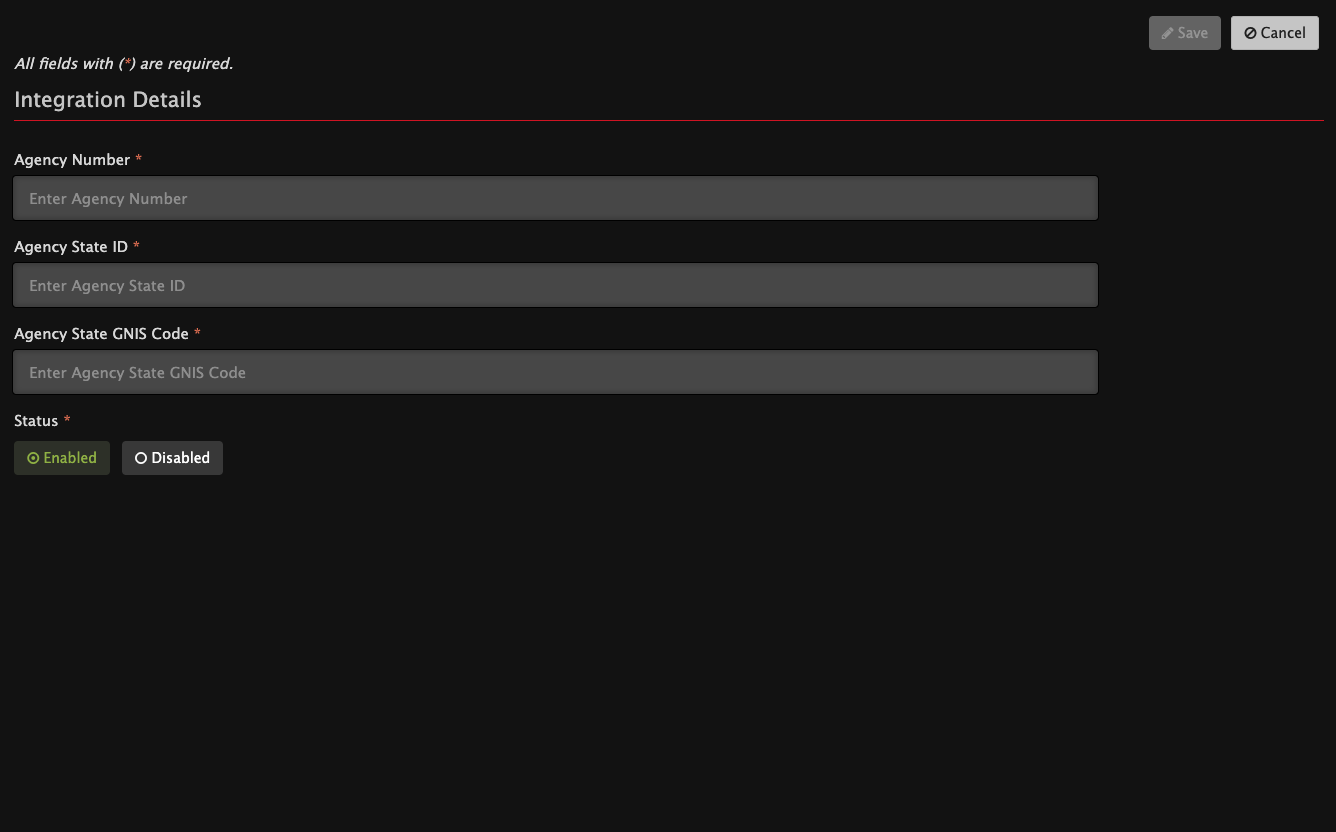
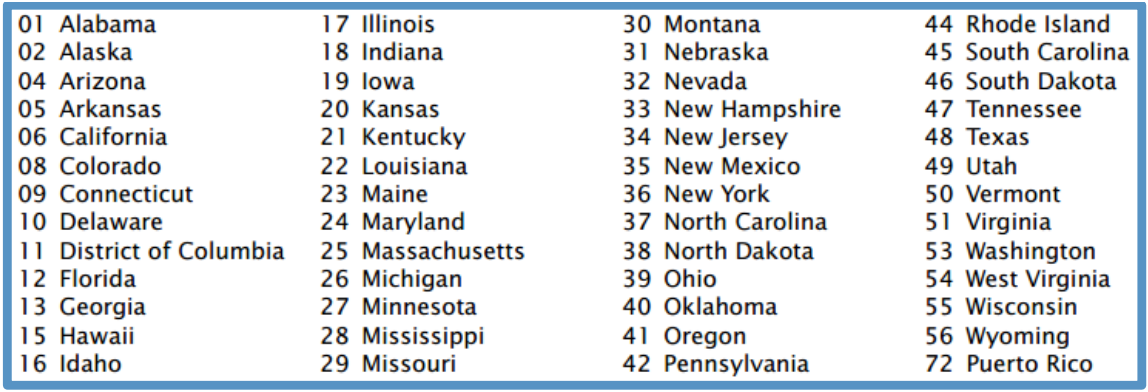
- Pulsara “Agency State GNIS Code” = Enter the appropriate code from the table below.
- Generate an API Token in Pulsara for entry in ESO (for more information on using API Tokens, check out this Knowledge Base article)
- In MANAGER go to EMS and select “API Tokens”
- Select “+API Token” and name the token “ESO Integration”
- Click “Save” and the token will be displayed ONE TIME ONLY. Copy this token, and paste it in ESO (or save it somewhere safe to later add to the ESO setup screens.
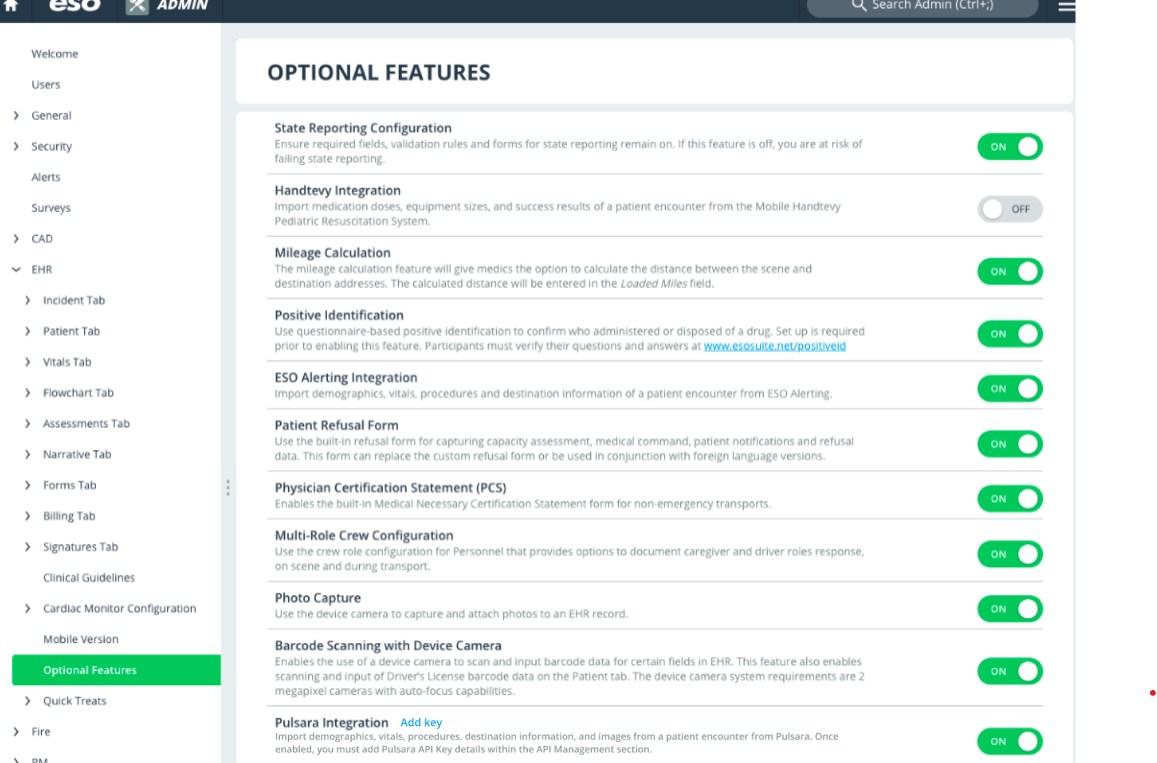
- From the ESO home page, go to “Admin”, then “EHR” and select “Optional Features”
- Find the “Pulsara Integration” and click the link to enter the “API Token”
- After saving the token, ensure the feature switch is “On”
Sending patient data to ESO
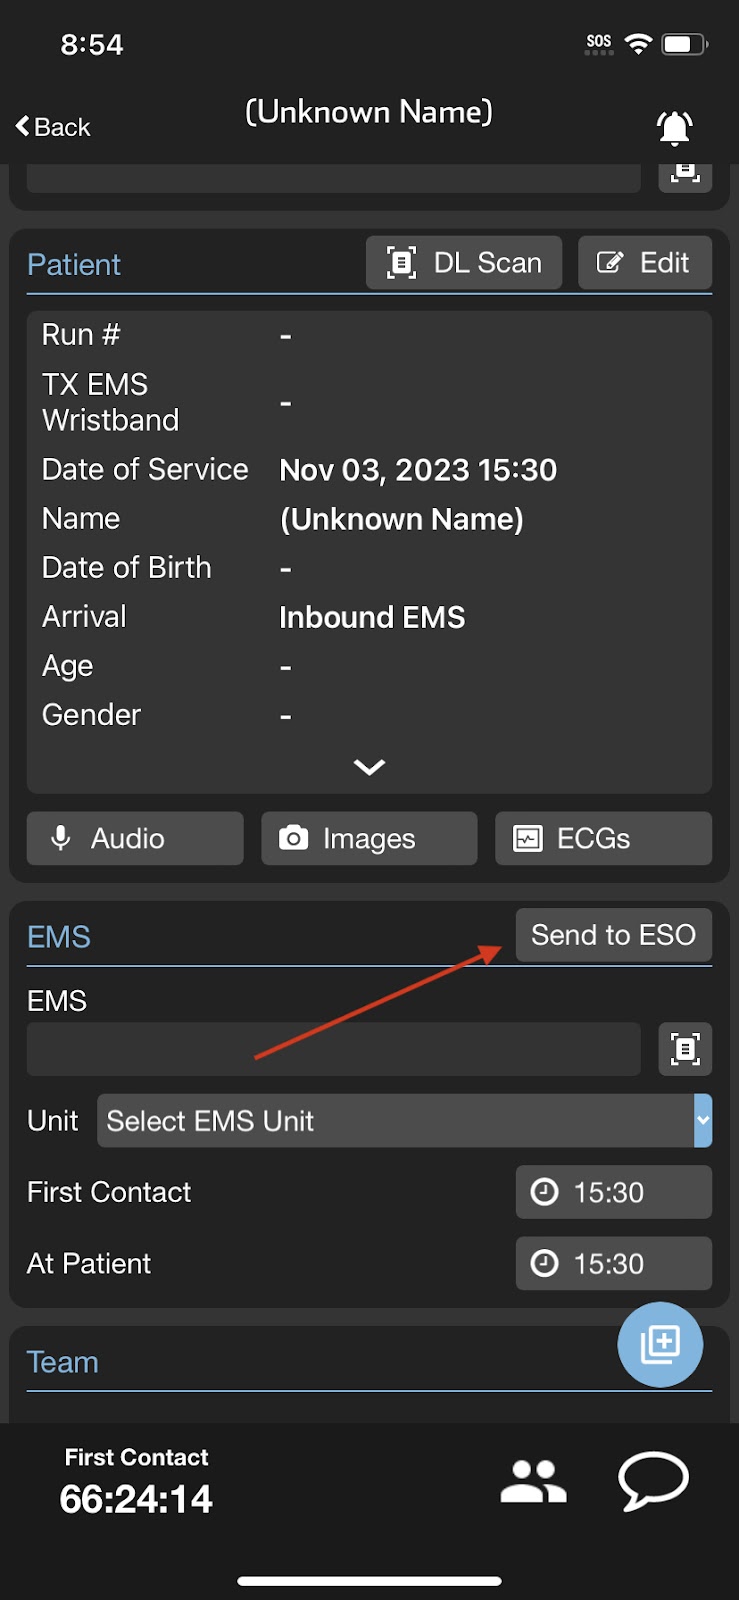
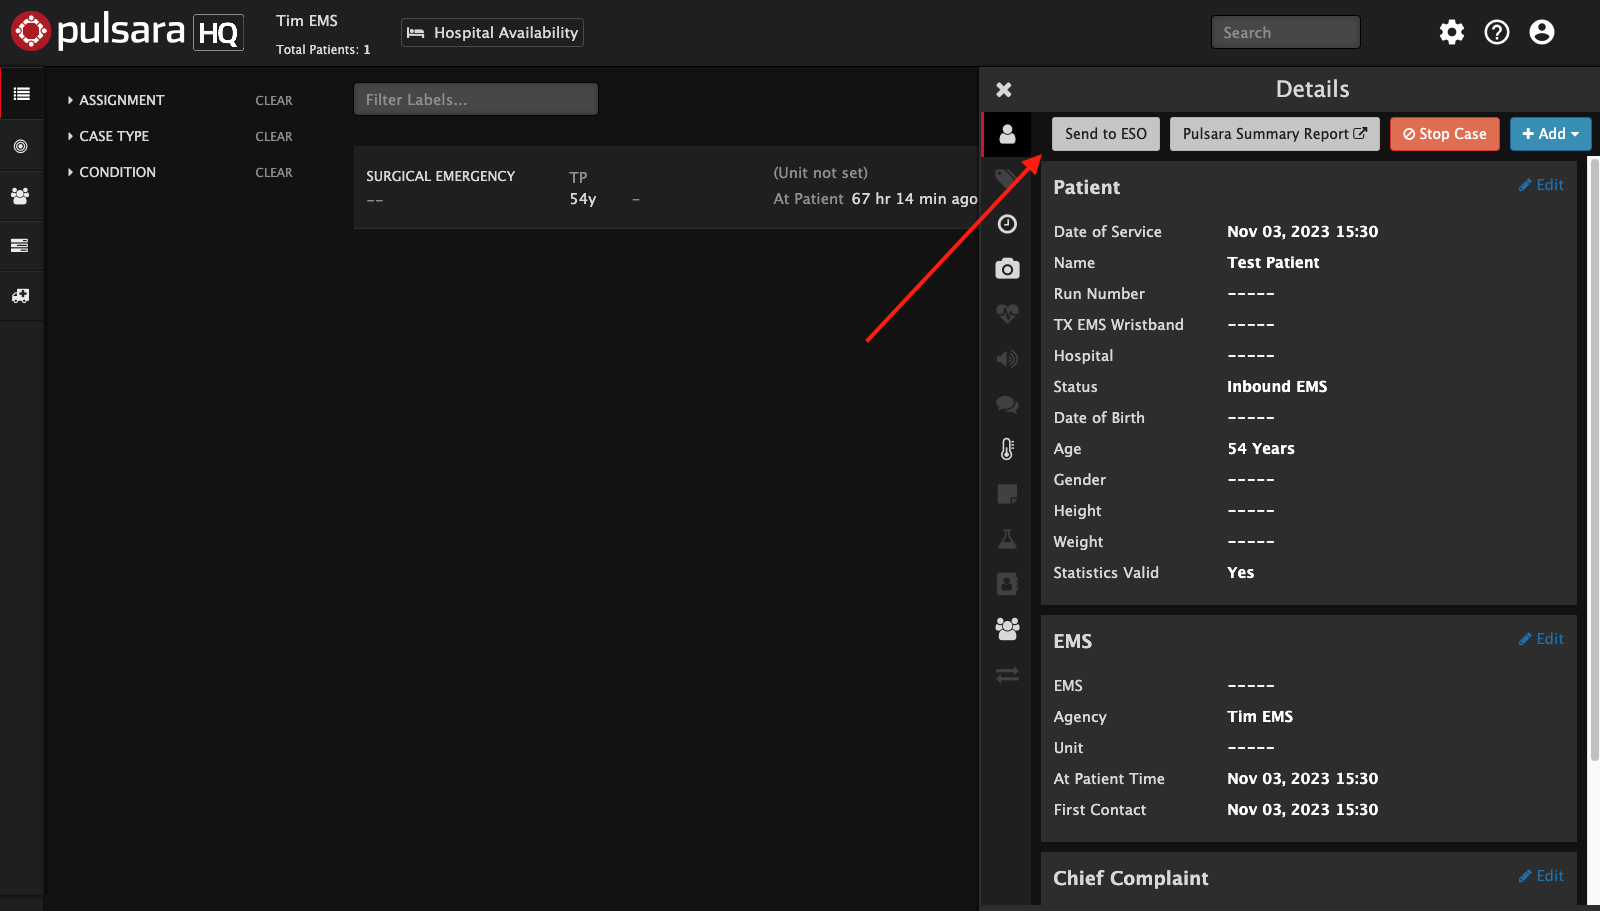
If your EMS agency has an ESO integration configured, a new “Send to ESO” button will appear on the patient channel while on the active patient screen.
- Using the button shown below will send data that is currently saved for the patient to ESO (See “Supported Data”)
- Each time the button is clicked, a new copy of the data on the channel will be sent with a new date and time sent
Importing the record into an ePCR
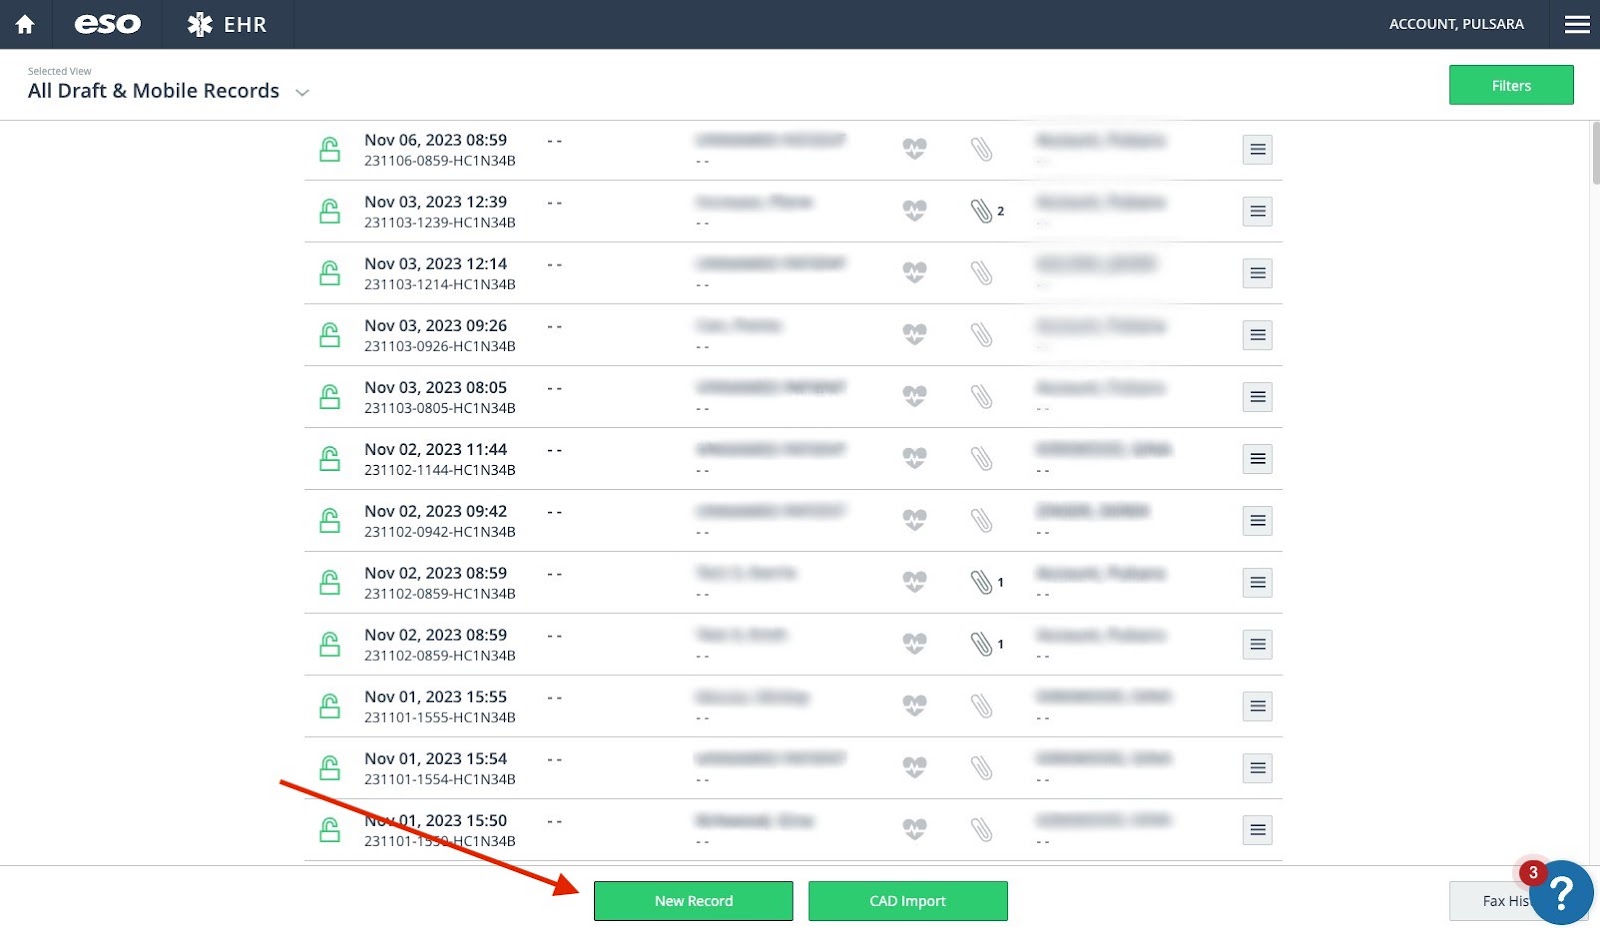
- Log into ESO’s suite and click EHR in the navigation menu at the top
- Select an existing draft record from the list, or Click New Record
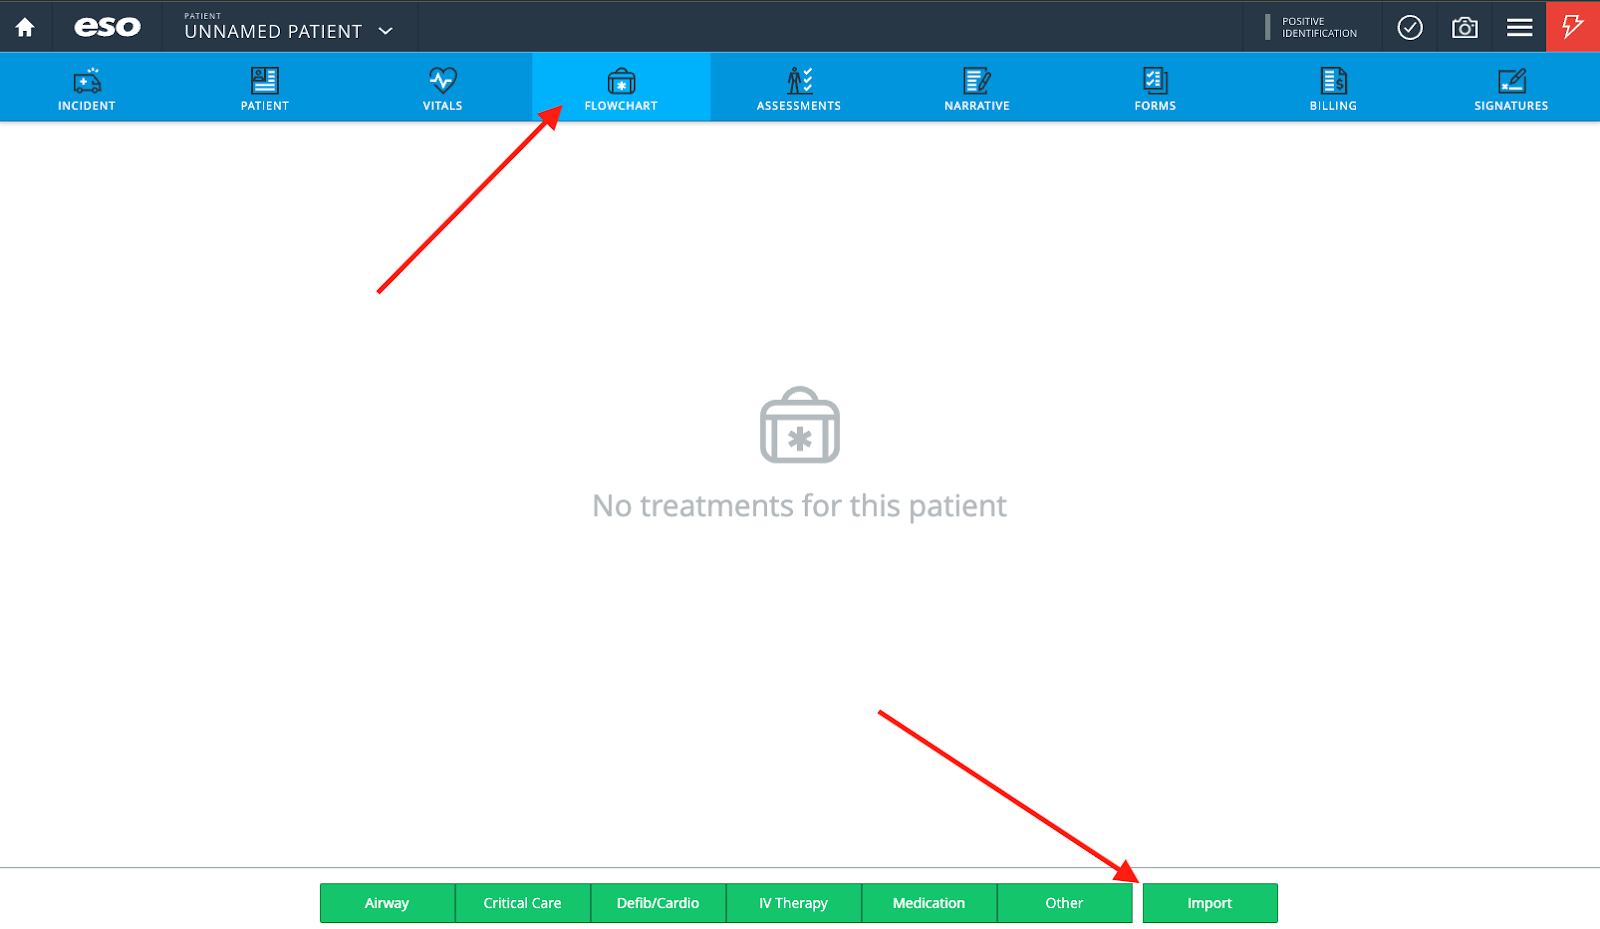
- Click the “FLOWCHART” tab at the top of the screen and then “Import” in the lower right
- Choose Pulsara
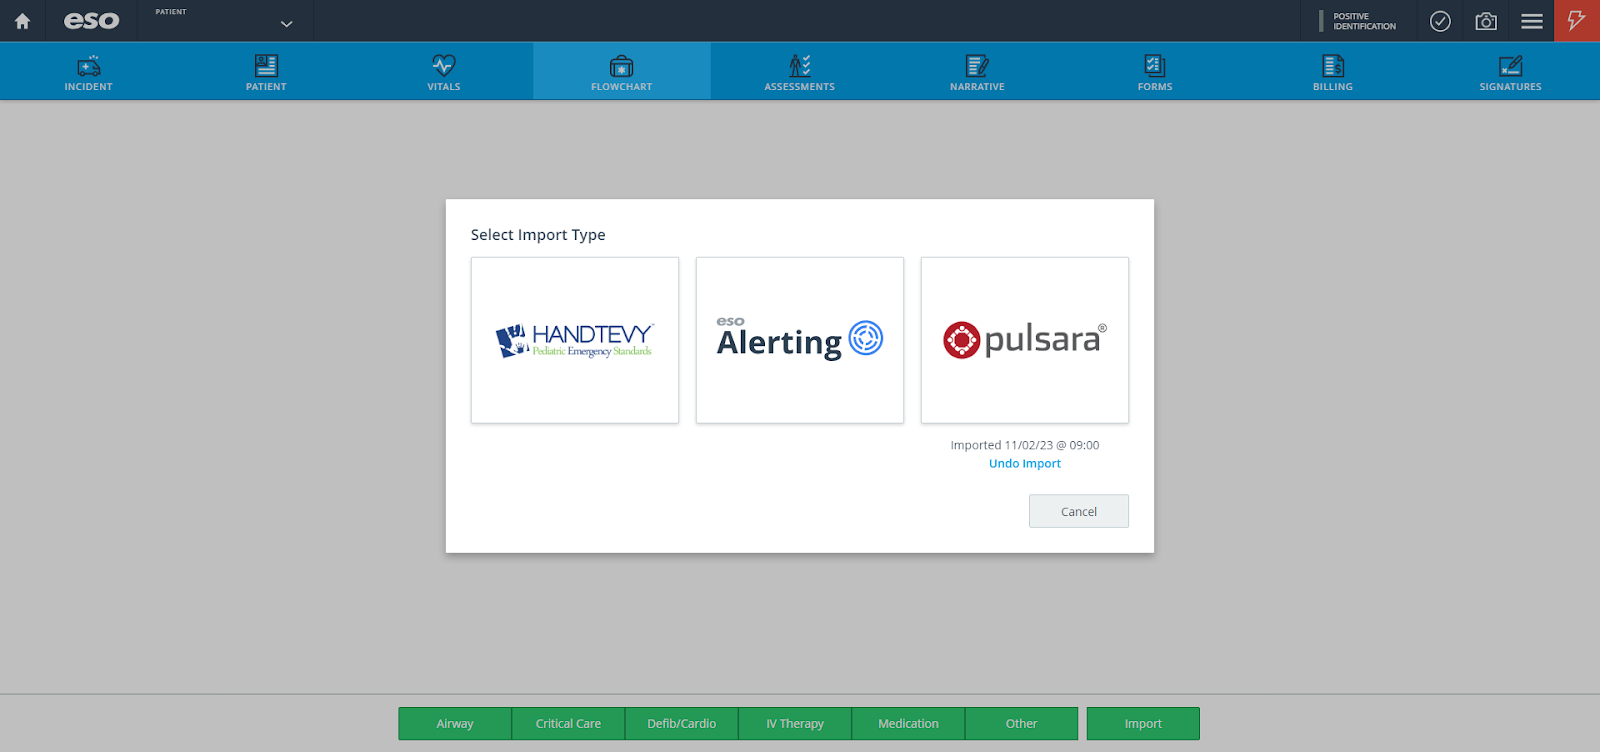
- Find the correct record, click it to highlight it and click “Receive” in the lower right
- If there are multiple records for your patient, use the “Time Sent” to select the appropriate record

Viewing the Data in ESO
- Supported Data - The following data can be imported into your ESO ePCR record:
-
- Patient Name (first and last)
- Date of Birth
- Patient Age
- Age units (years, months, days)
- Weight
- Vitals (see below)
- Date/Time of vitals
- Blood Pressure
- Heart Rate
- Pulse Oximetry
- Respiratory Rate
- Temperature
- Blood Glucose
- Images & ECGs
- You use the tabs at the top to view the information that was imported:
-
- Patient demographics are in the Patient Tab
- Vitals are in the Vitals Tab
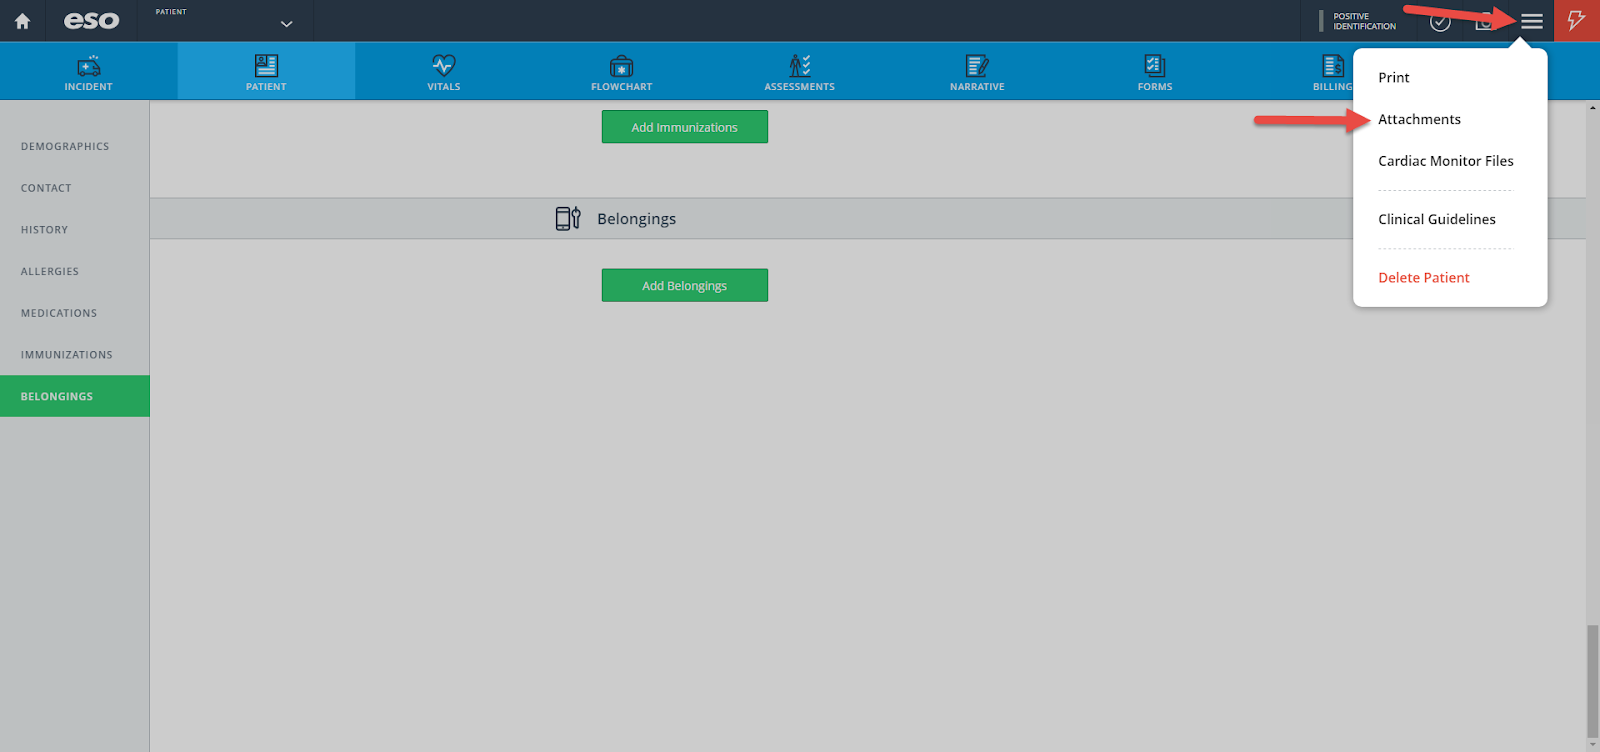
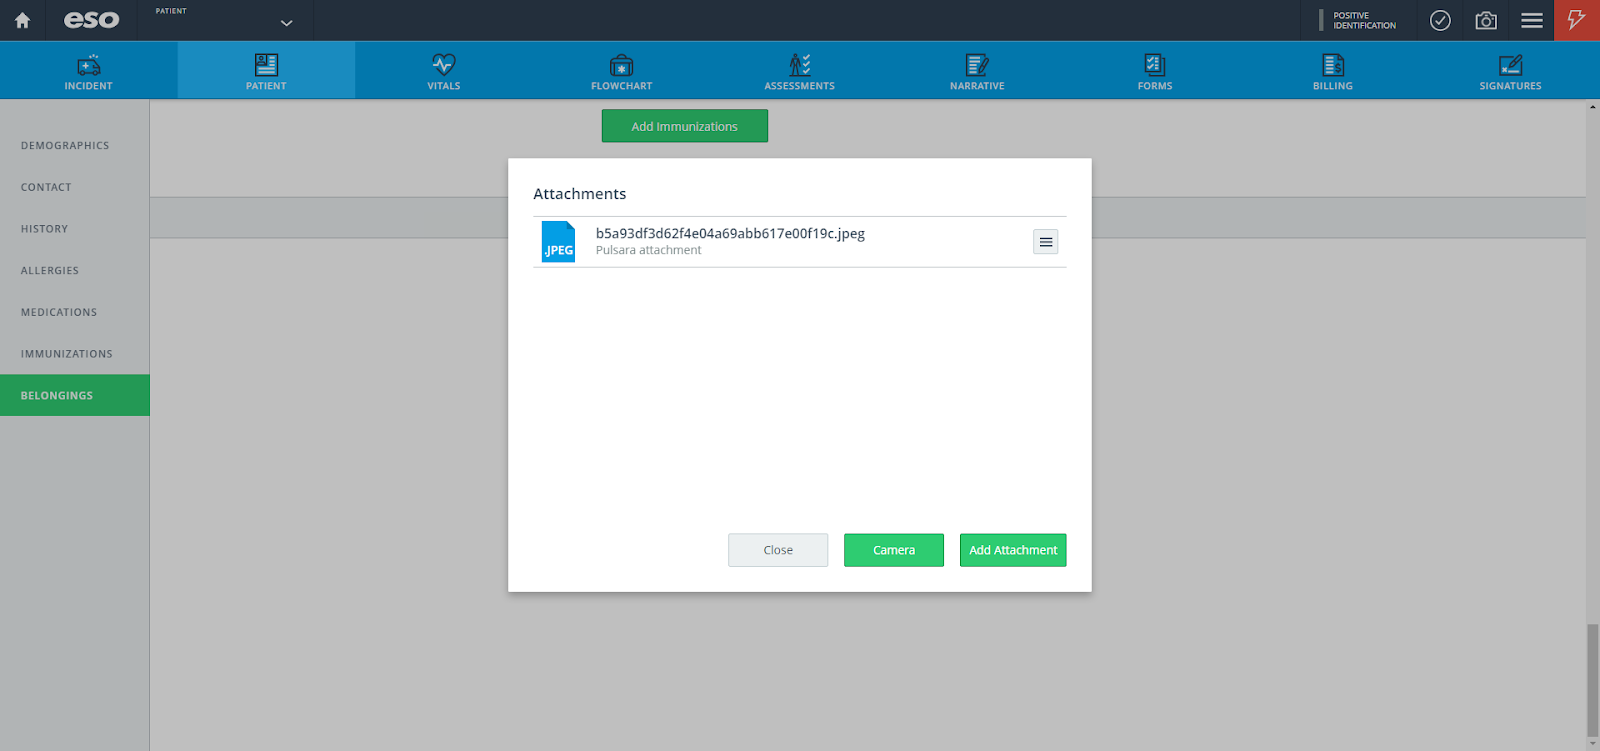
- Images are viewed by clicking the menu icon in the upper right corner and then selecting “Attachments”
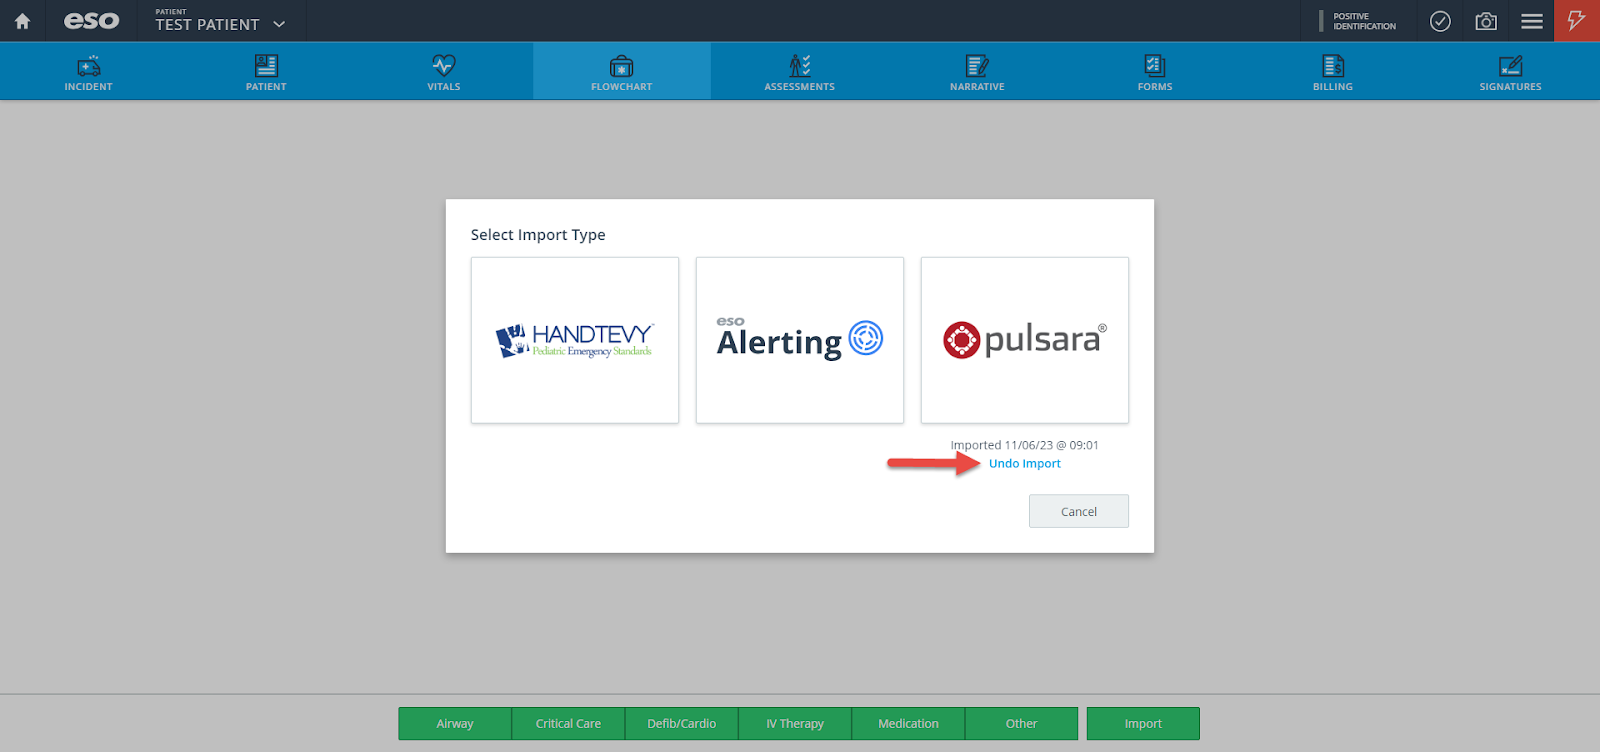
Reimporting the Data in ESO
- If you need to reimport a Pulsara record for any reason, you must first undo the previous import on the ESO record.
-
- In the EHR go to the Flowchart and select “Import”
- Then select “Undo Import”